iPod Classic Restoration
Comment from 2024 added at the end of post
It sure has been a while since my last post. Life really picked up since 2019 but I am trying to get back to this blog. Here’s a short piece on a recent successful project that’s had a big impact on my day-to-day.
For a while now I have been on the hunt for a dedicated mp3 player that was not android based, had good battery life, and had a good UI. Years ago I purchased a Hidizs AP60 II which is about the size of a matchbook and worked just fine, but the UI was limiting and the battery just was not large enough for my needs. Eventually I pulled the SD card from that AP60 and switched to using my phone with VLC to handle all my music.
The phone is a great solution but having the entire internet at my fingertips while trying to listen to music proved to be too much of a distraction. After returning to some research I had started many years ago I discovered that iTunes still supports the iPod classic and that replacement parts for the iPod are readily available and very affordable.
With the help of great tutorials from iFixit and DankPods (youtube) I was able to replace the failed hard drive in my sixth generation iPod Classic with a flash adapter and 128GB SD card, the flat battery with a brand new unit, and the scratchy headphone jack with a working unit. Battery life is fantastic at over 40 hours which means I have to charge the thing about once a week and the device overall is as reliable as it always was.
I won’t go through the repair process in depth because fantastic tutorials covering that already exist. What I have included here are links to a few helpful sites and some photos I took during the process which show the retaining clips and internals with additional detail I wish I had before tackling this project.
A few quick notes on using a flash based iPod in 2023
- Make sure you format your SD card(s) to exFAT before buttoning your iPod back up
- The iPod UI is still so user friendly
- Cover Flow is slower than you might remember, but it’s still solid
- iTunes still isn’t great, but it works
- Rockbox still exists but i’m a sucker for that stock interface and I’m fine with 320 kbps MP3 and don’t need FLAC
- The day iTunes stops supporting the iPod Classic is the day I switch to Rockbox
2024 Addendum My restored iPod is still going strong but I wanted to mention a very promising alternative that I found mentioned on mastodon in late 2023/early 2024. The Tangara is an open source/open hardware mp3 player made by the Cool Tech Zone team out of Sydney, Australia. I don’t have one but the project is active and every update I’ve seen has been great. Definitely worth checking out if you are in the market for a dedicated mp3 player.
Parts list for my rebuild⌗
- iFlash Dual Adapter (EOE website was out of the iFlash Solo units when i was ordering parts)
- SanDisk 128GB Extreme PRO SDXC UHS-I Memory Card
- Manufacturer Model Number: SDSDXXD-128G-GN4IN
- 850mAh battery for thin model 5th/6th/7th gen iPod Classic
- Headphone Jack and Hold Switch for iPod Classic
- Metal Opening Tools x3
- Kapton tape, to hold components in place
Parts Suppliers⌗
- Tarkan Akdam’s iFlash Adapters (UK) - https://www.iflash.xyz/
- This is the site for the creator of the flash adapters. I did not order from this site only because I found a US supplier.
- Elite Obsolete Electronics (US) - https://eoe.works/
- Kansas, USA business dedicted to iPod replacement parts and refurbished iPods. This is where I ordered all of my replacement parts from. Service was great, order processing was quick, and all of the parts were quality. Very much recommend for US based orders.
- Amazon for the SD card
Tutorials for the repair process⌗
iPod Classic Repair on iFixit
How to fix every iPod Classic. by DankPods
Images from the teardown⌗
These are the reference shots I took for myself in case I ever have to get back into this iPod in the future. A couple of internal component shots are included as well.
 The bottom two latches that secure the back case to the aluminum frame. You want to insert the case tool directly where this latch is located.
 The top latch that secures the back case to the aluminum frame. You want to insert the case tool directly where this latch is located.
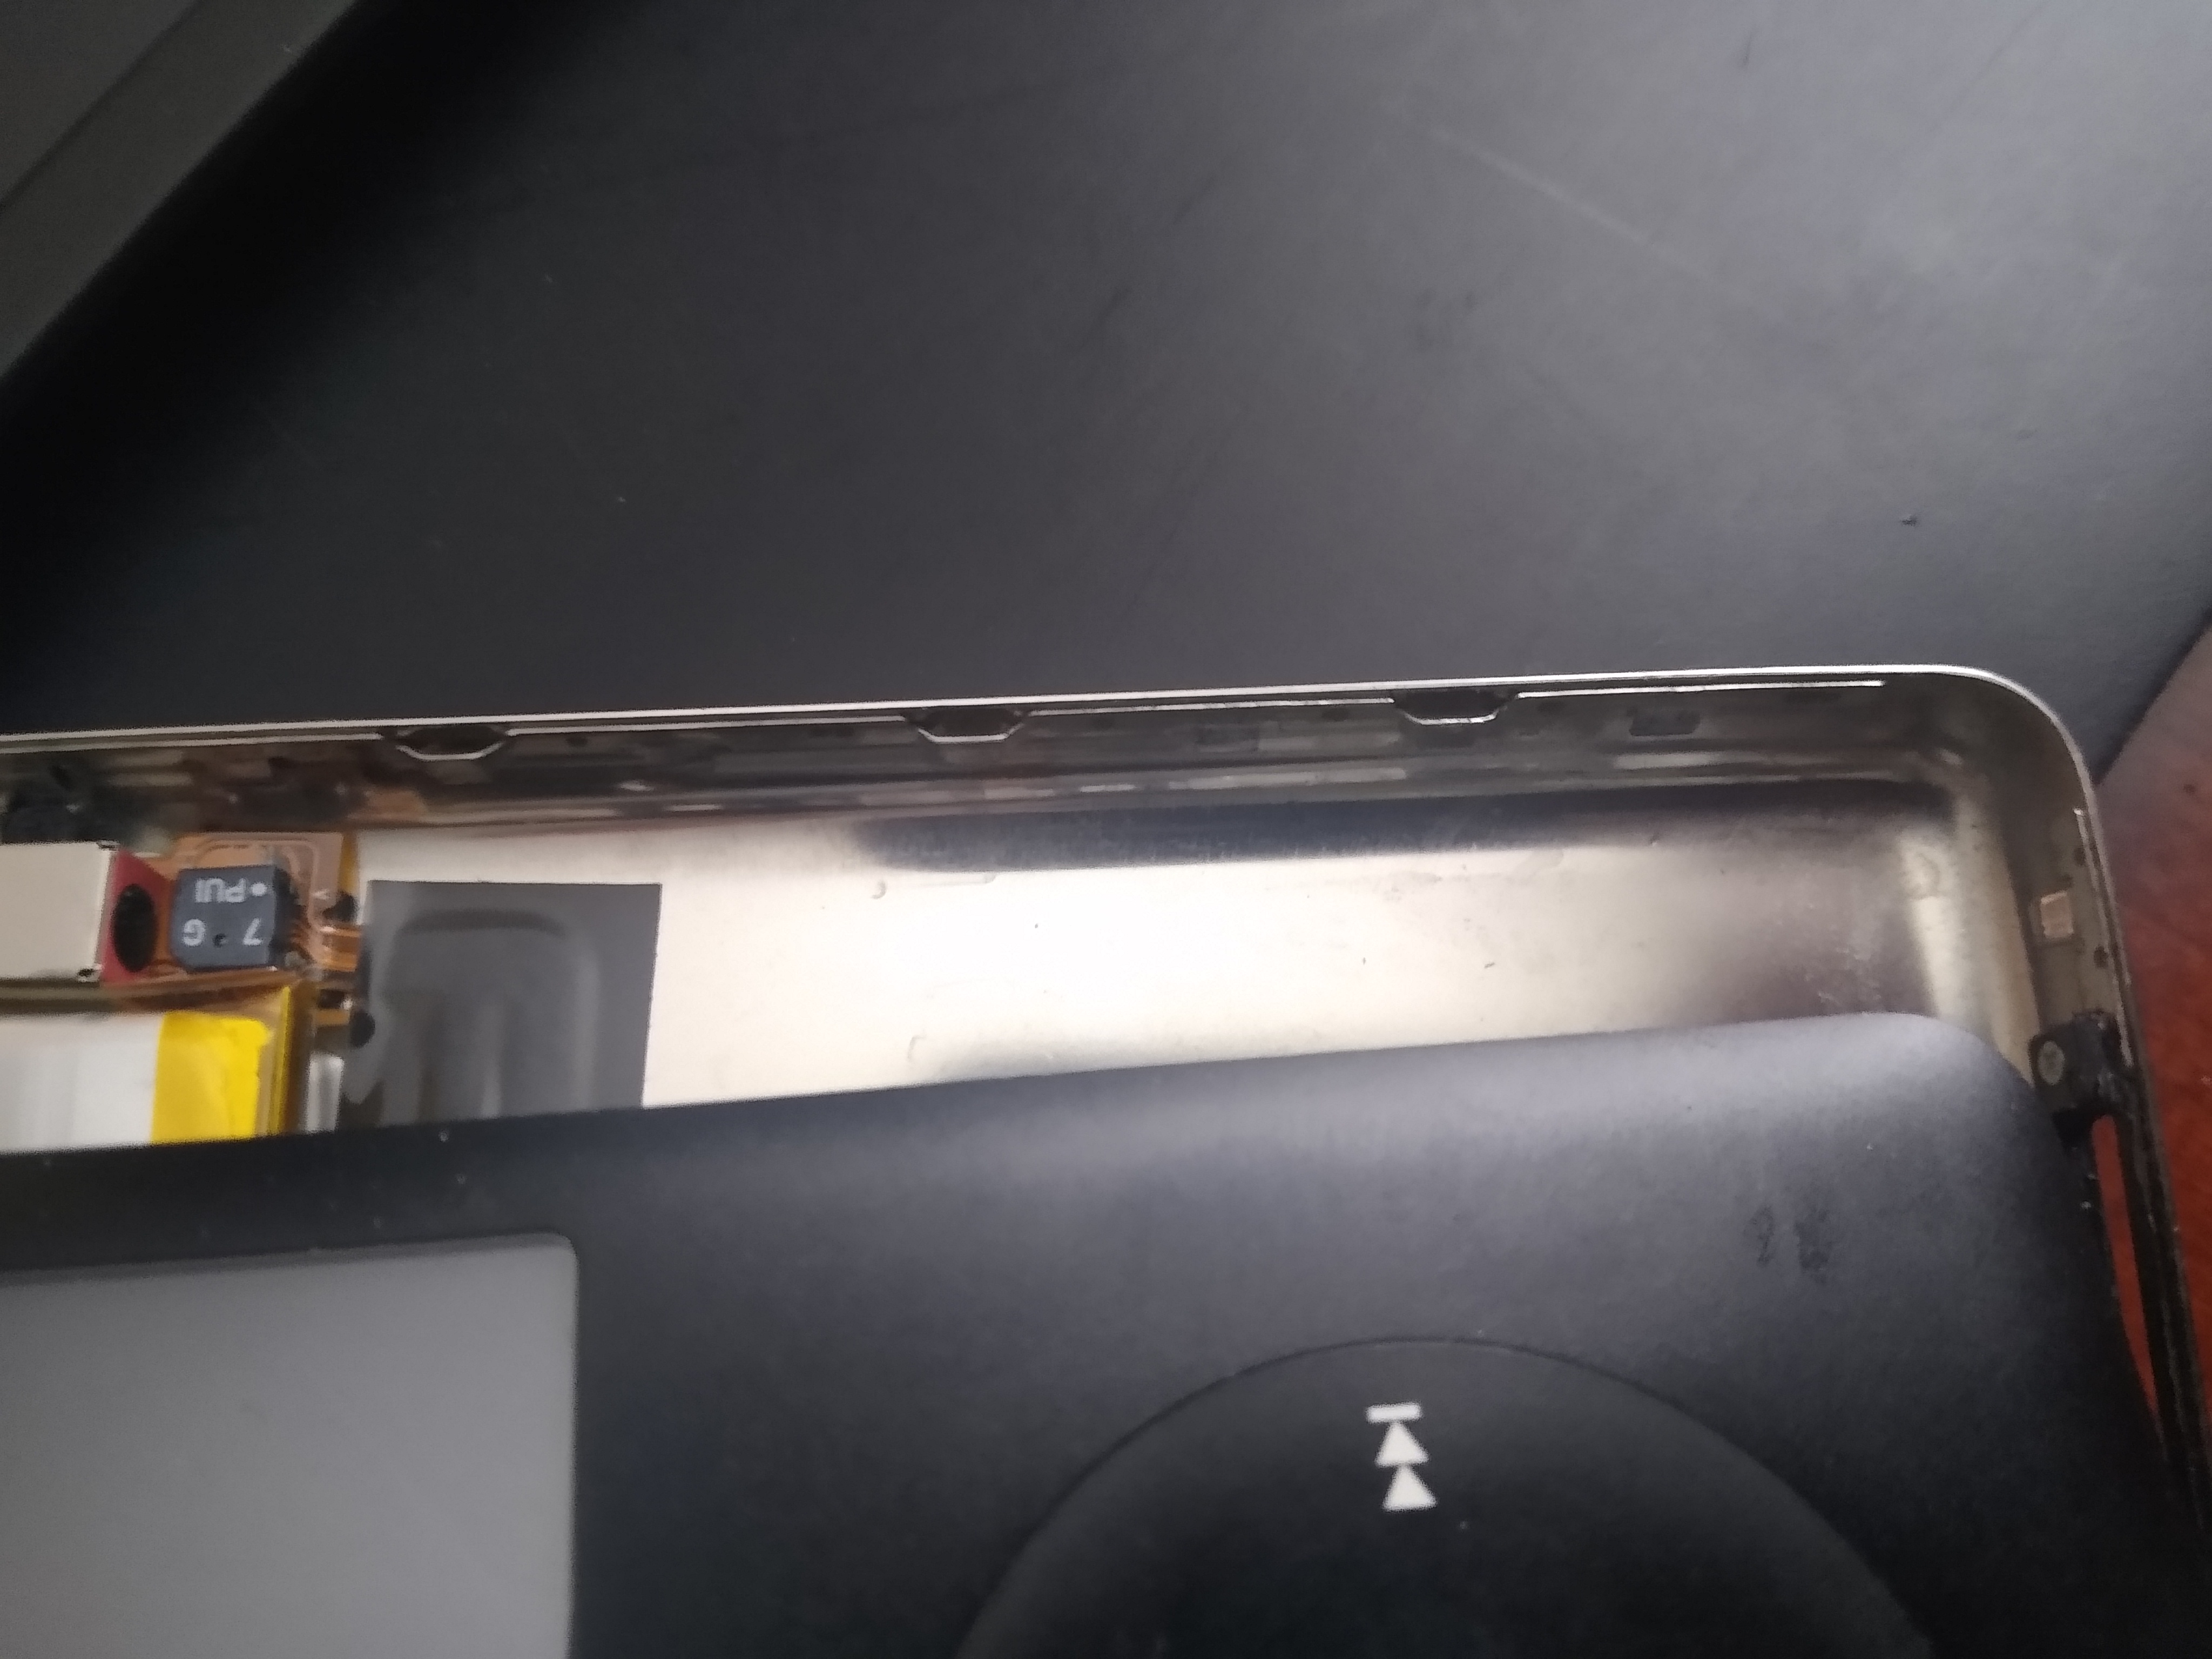 The internal clips on the right side of the back case. You want to insert the case tool in the space between these.
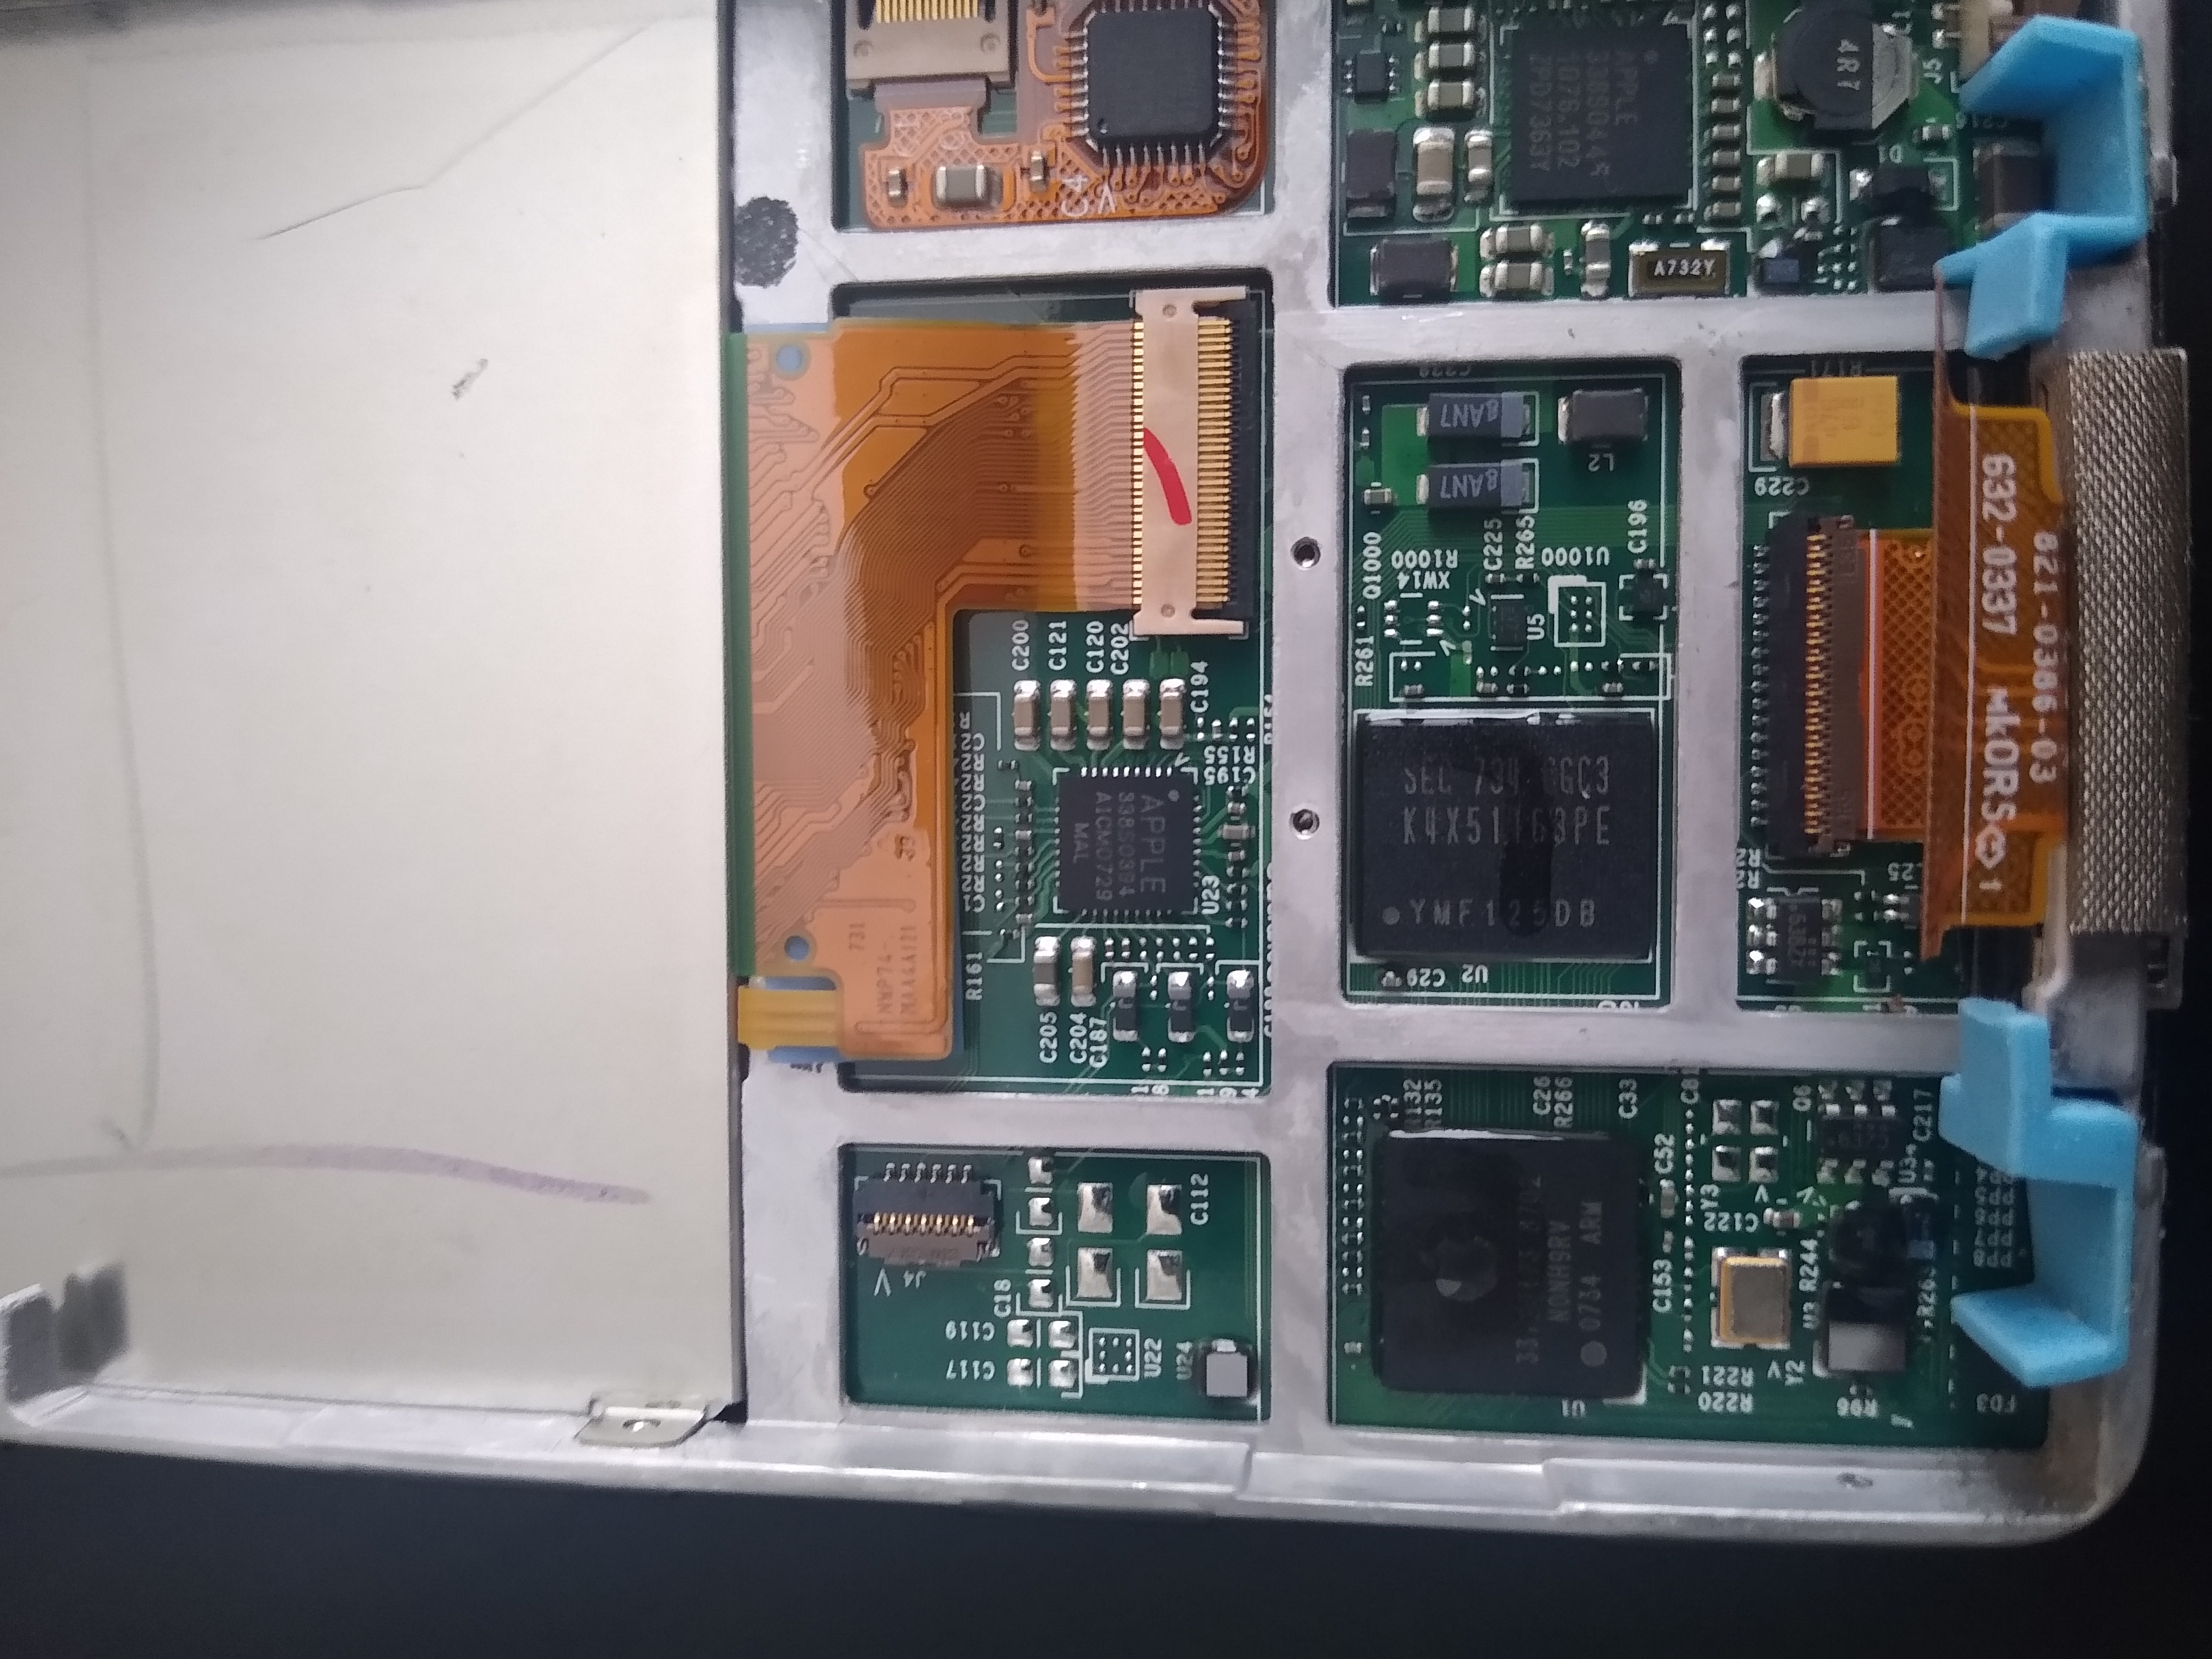 Back side of the screen (left) and the logic board behind the click wheel. The blue spacers are free floating and secure the hard drive against shocks.
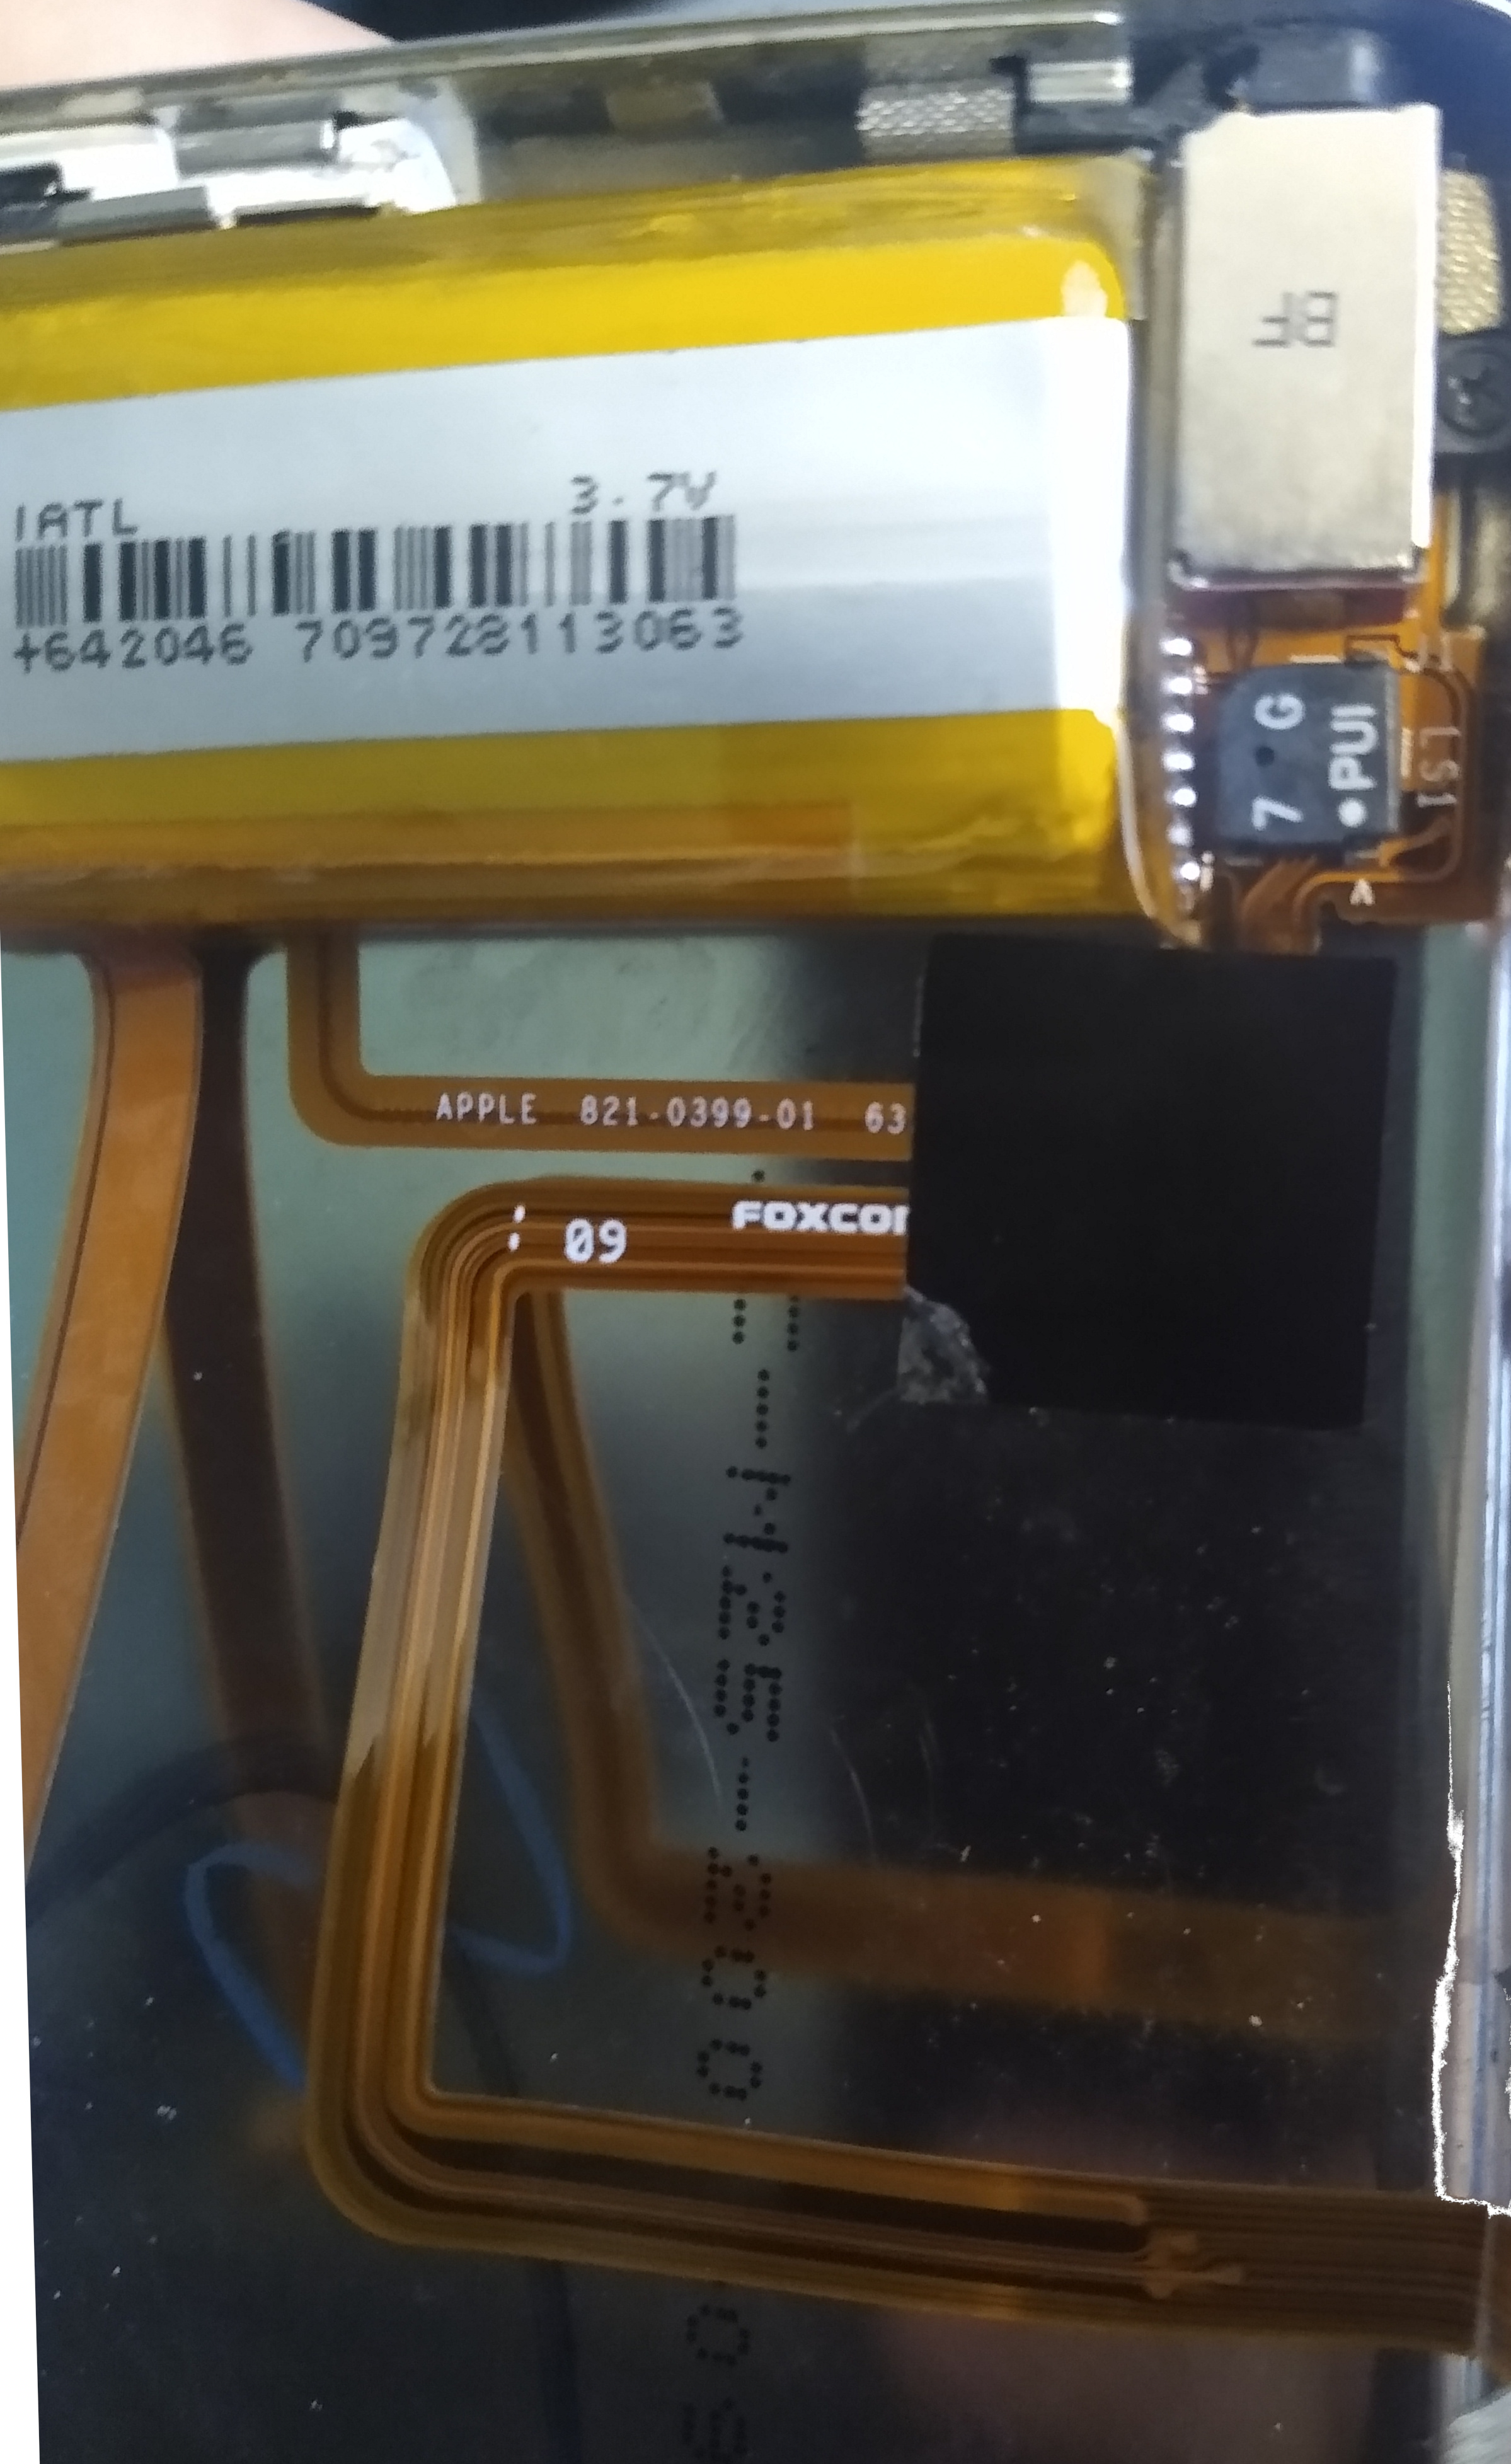 The original battery, headphone jack, hold switch, and the cabling.
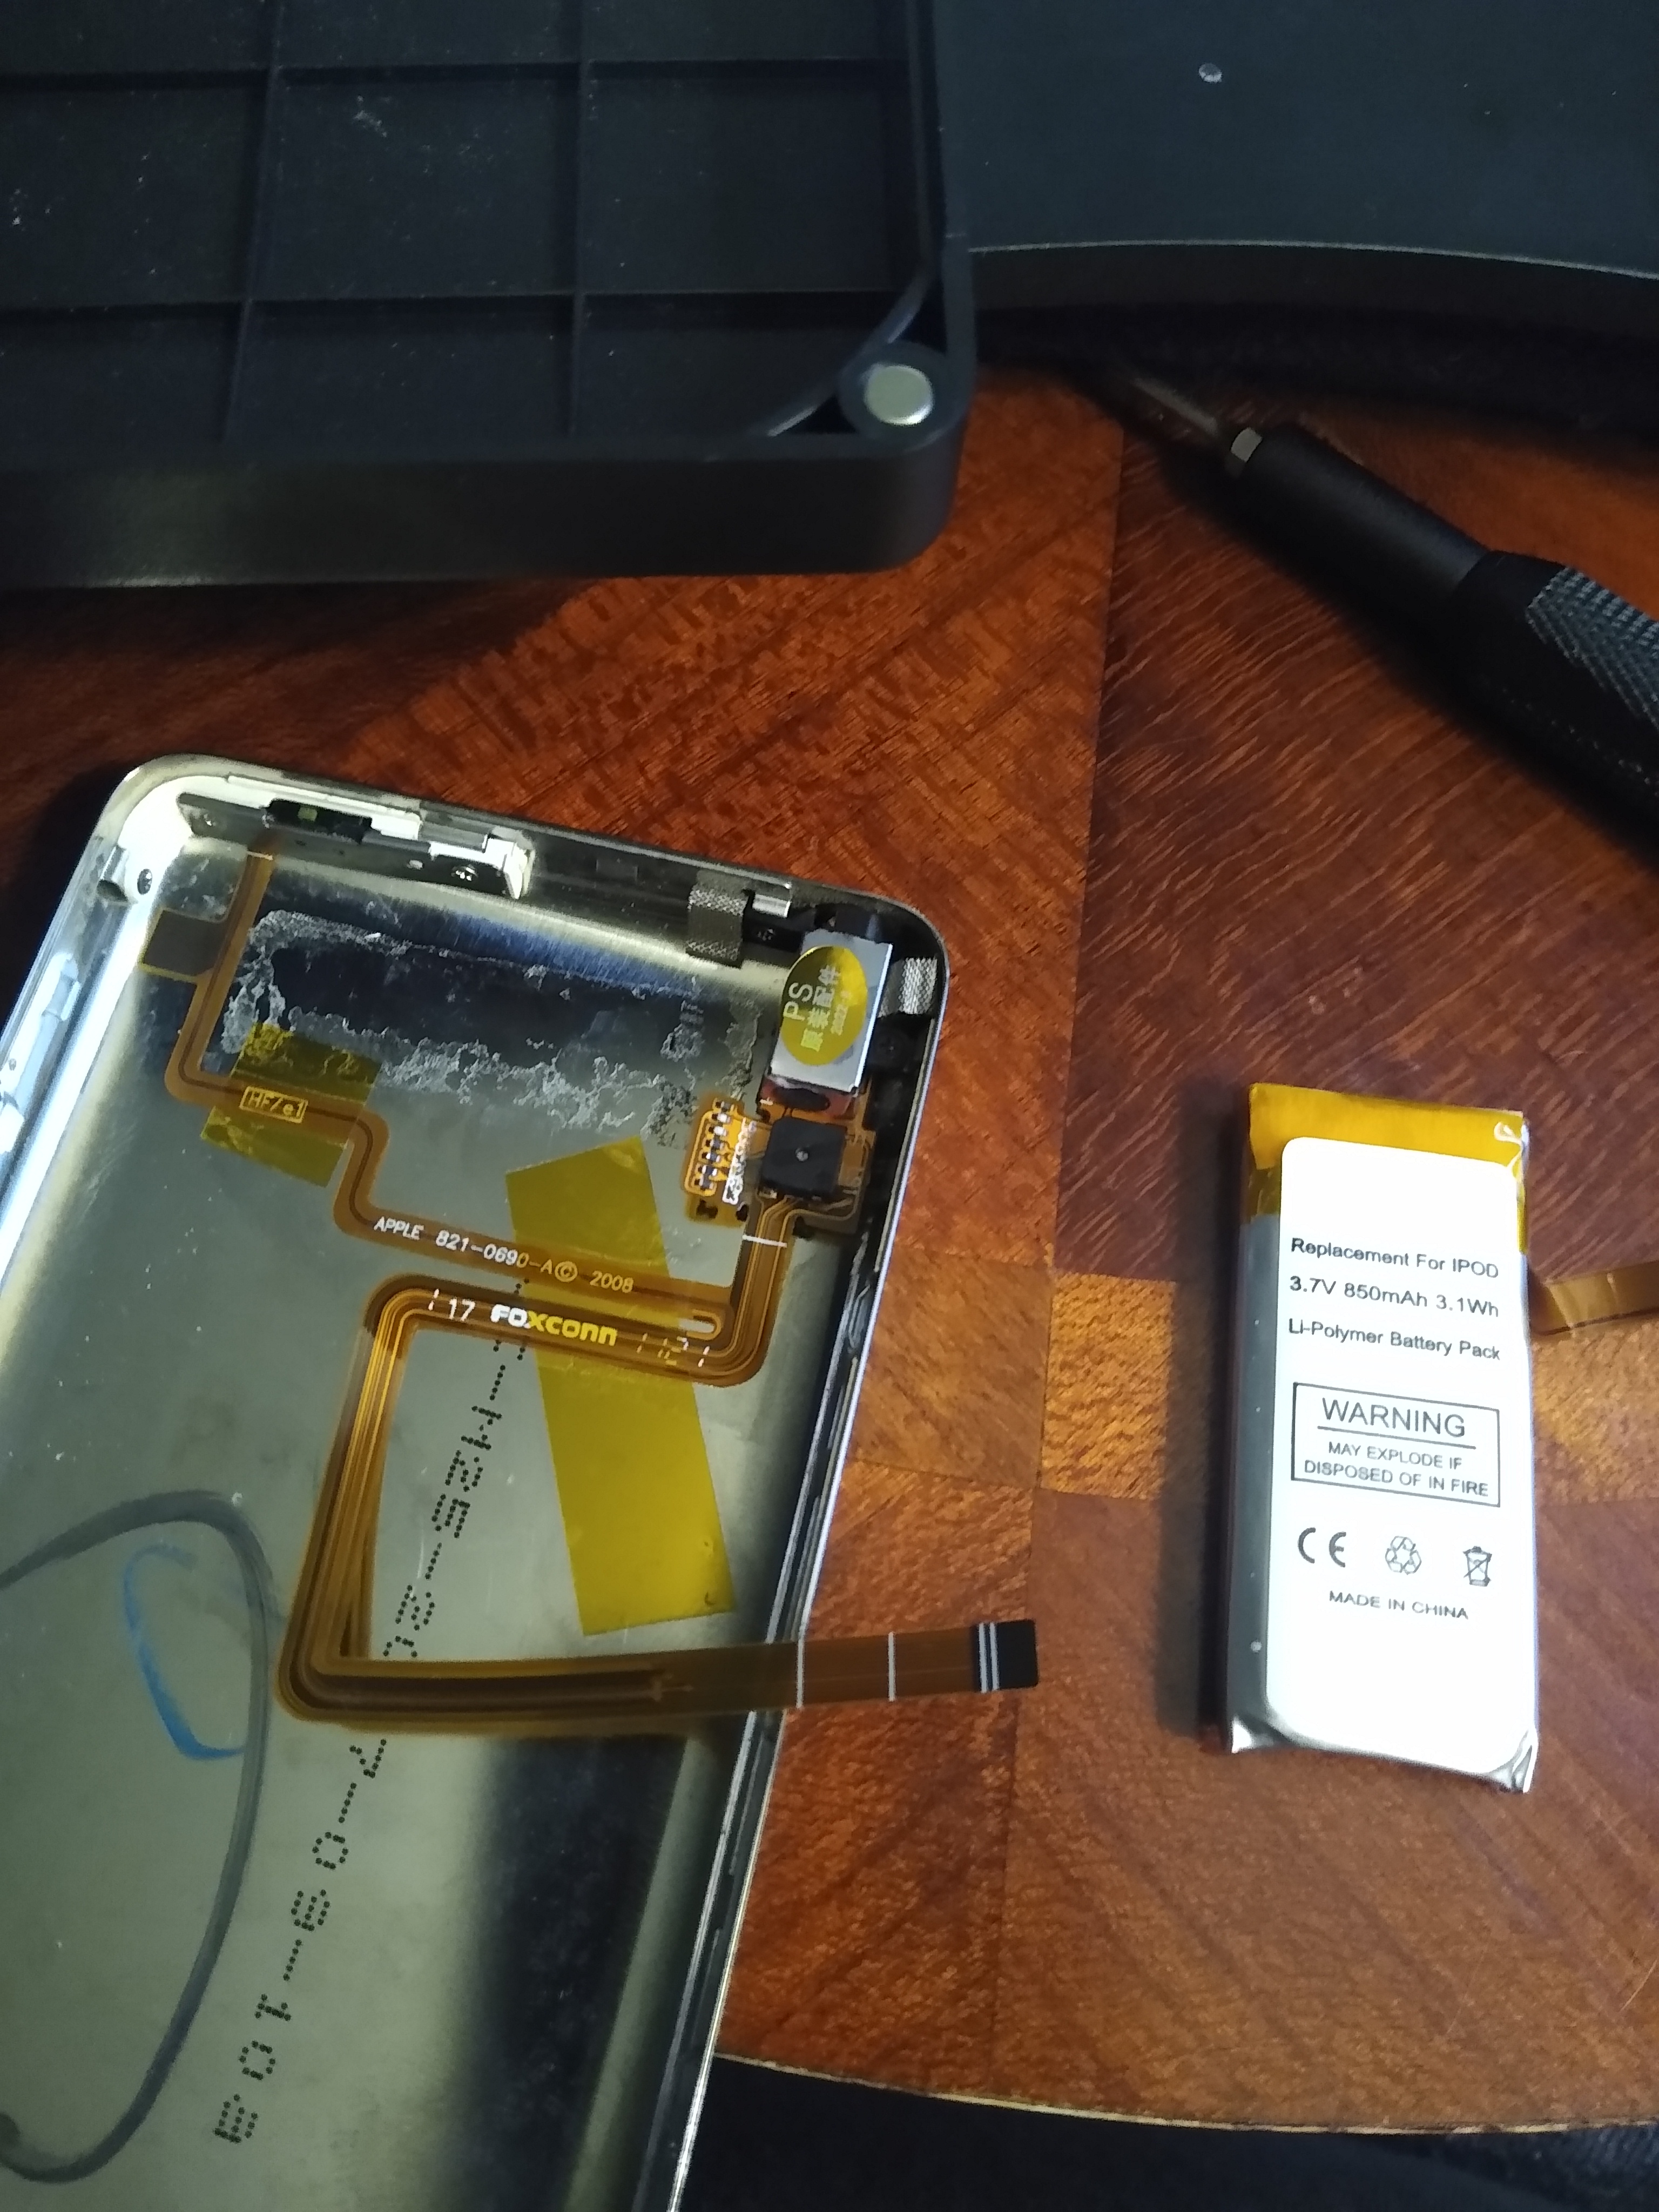 The new headphone jack and hold switch installed in the case back. Battery to be installed where the old glue remains in this photo.
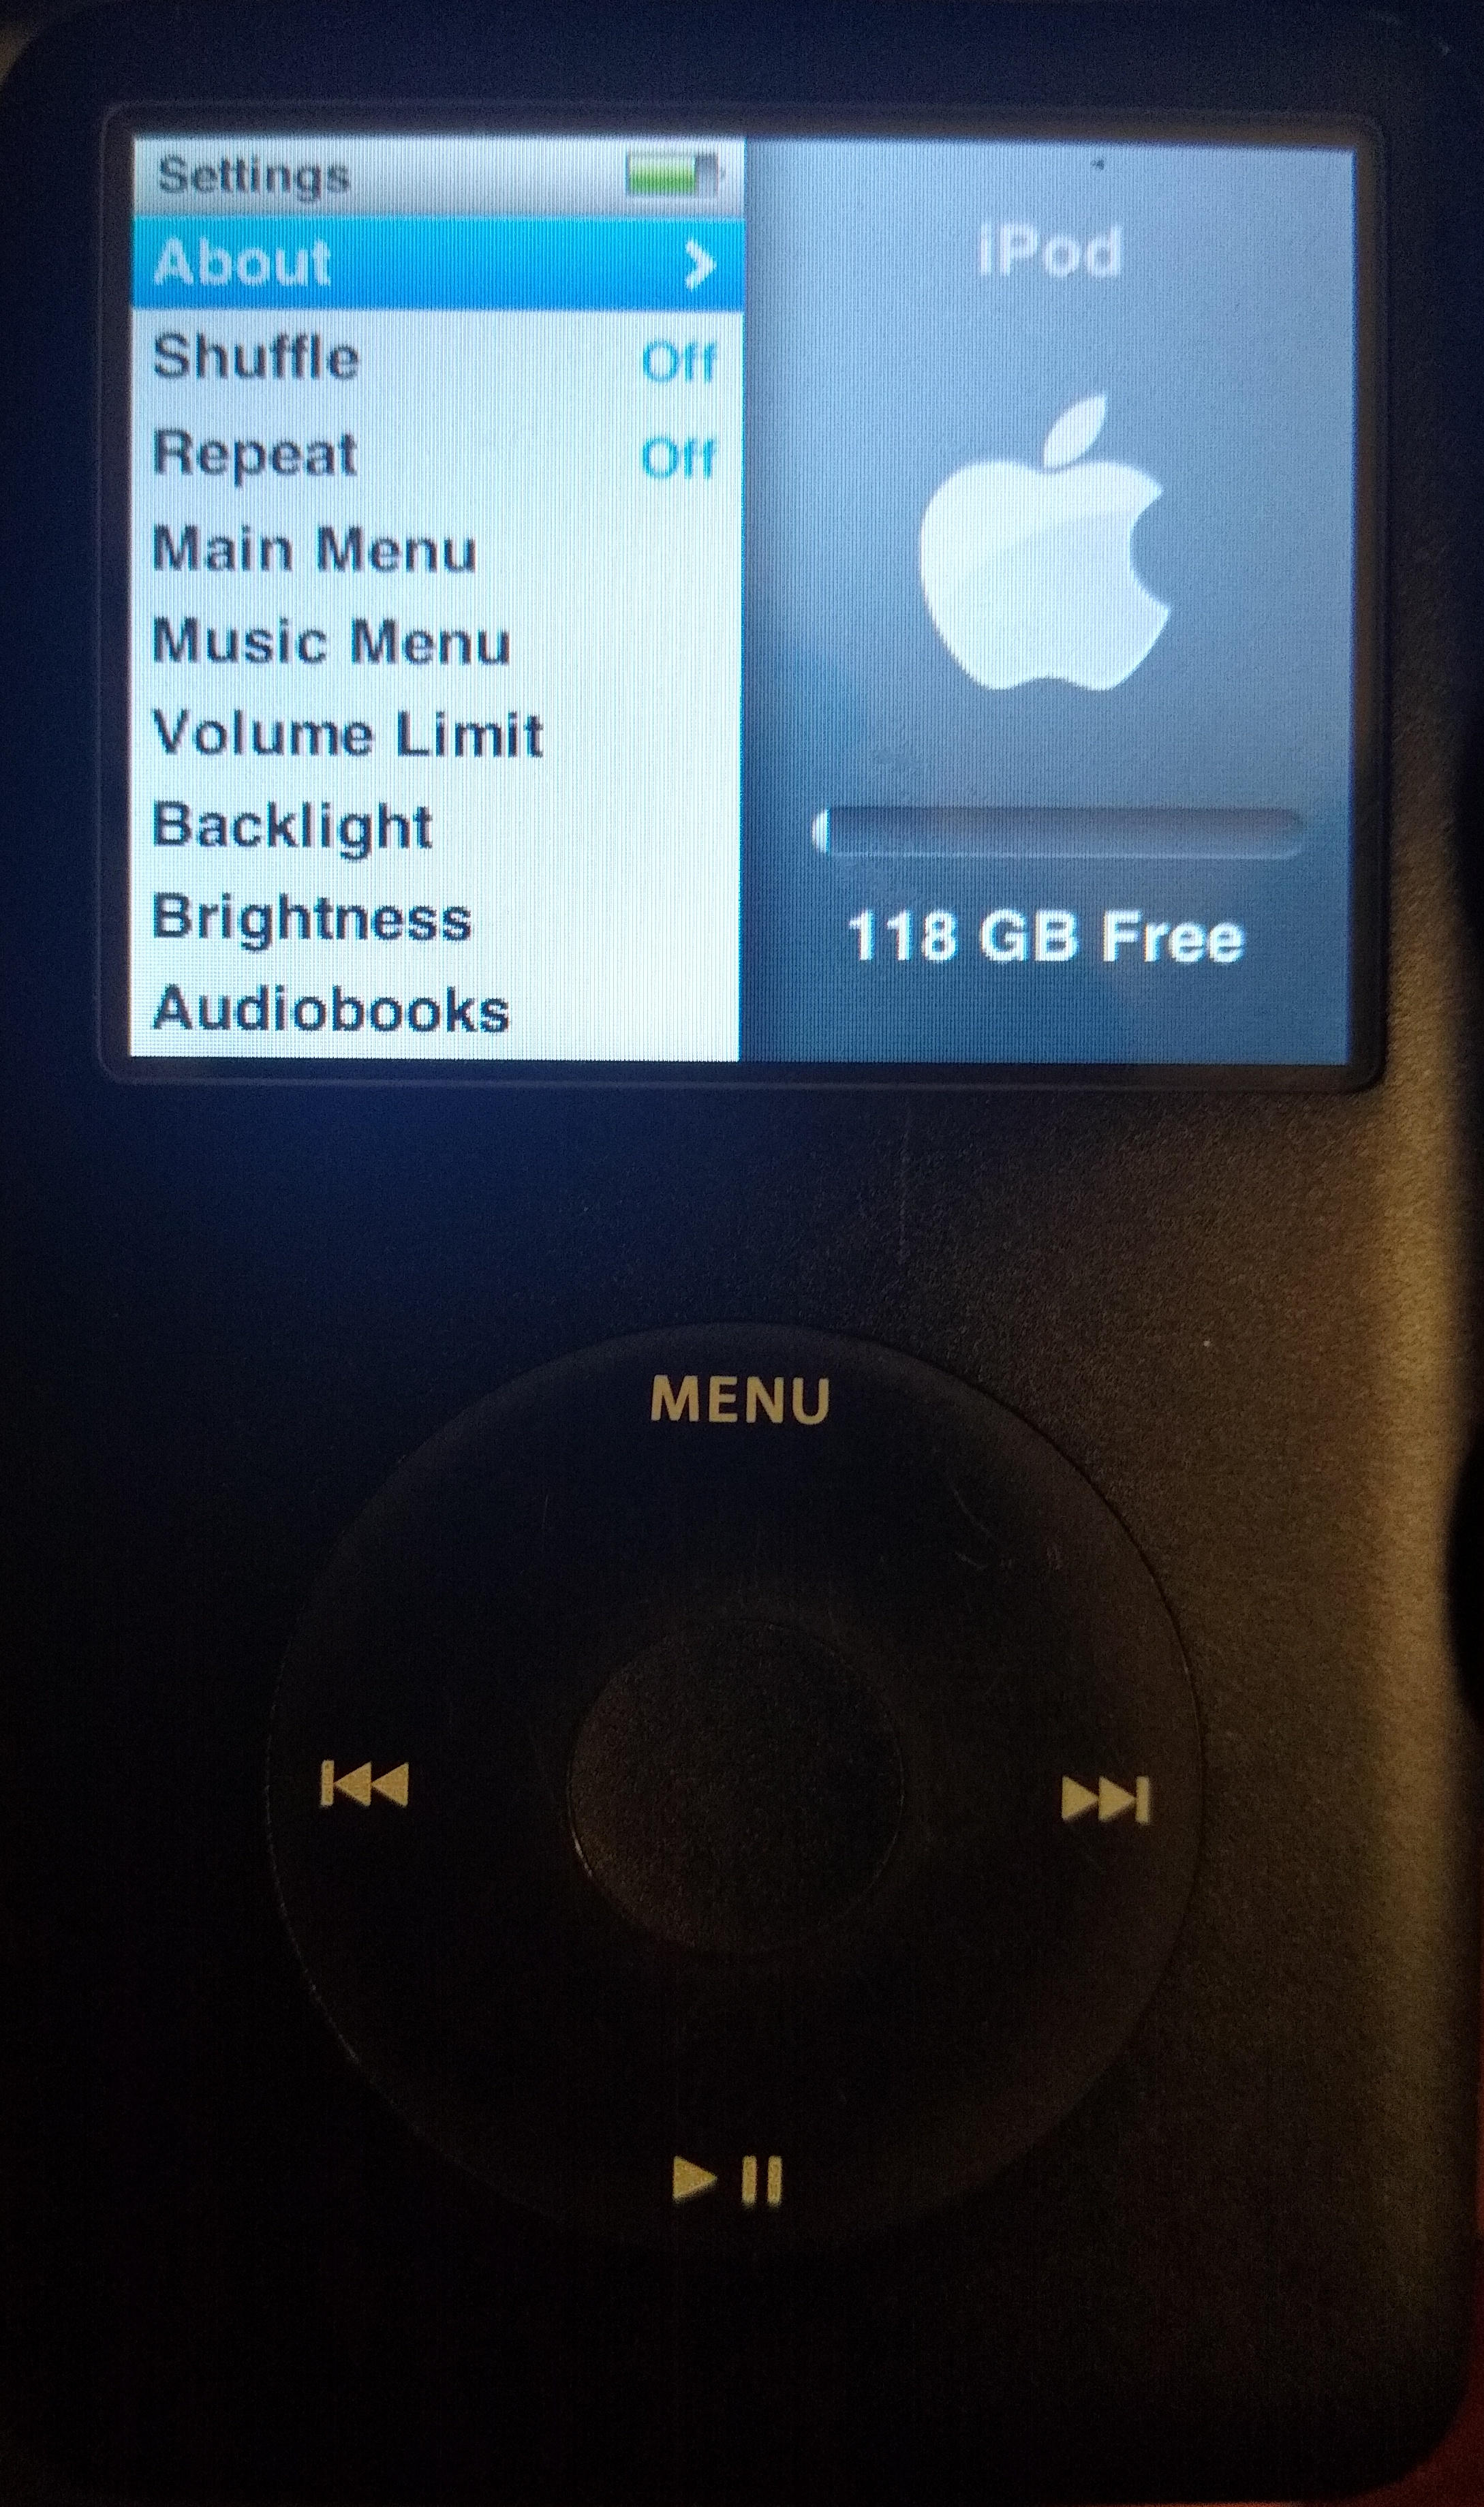 The finished product with 40GB more space than the original HDD.